Videos and Projects Image Map

Monday, May 25, 2020

I am no longer a Stampin' Up! demonstrator.  I could not keep up with the minimums just doing this as a hobby.  That said, the buttons on my website will no longer take you to anything related to Stampin' Up! or Paper Pumpkin. 

I still have my Facebook page and Etsy shop that I will be posting to.

Have a great day!


Sunday, January 27, 2019

It's been a while since i've been on here.  One of my New Year resolutions was to post more often, oops.  It's still January!!  Well, better late than never I suppose.

It's been busy, not going to lie.  A good busy.  More and more people are asking me to make my cards for them.  I'm always excited that people actually like the cards I make!  For instance, here is a card that I made as a gift which ended up becoming an order for more.


I think I ended up making around 50 of these for her.  I was so honored that she asked!

Over the holidays, I found a new obsession.  Ornaments.  I made everyone at the office an ornament for our Christmas tree.  They were well received and made great gifts.  Here are a few examples.  After I colored them, I embossed their names and embellished them a bit.


Unfortunately, I forgot to take a picture of the finished product 😜

Another friend of mine asked for a specific gift card holder for a friend of hers who likes Coach purses.  So, of course, I had to make her one!


It also gave me the chance to use my Cricut again.  I forgot how much fun this machine could be.

I often get a few "unusual" requests and I try my best to accommodate-here is an example:


Yes, you're not seeing things.  That is a Scooby Do bong.  I still can't believe I found one!

I was also asked by a coworker to make one of his clients (a woman who has everything) a wedding card.  It's a bit busy, but I thought elegant. 


Now, this one has a funny little story to it.  My boss's daughter had a baby who he announced as "James Vincent".  So I thought I'd make a card for them and have everyone at work sign it as a surprise.  Well, when I went to hand it to him, a coworker told me that they were going to call him "Vinny" and that his first name was actually Vincent!  Long story short, I threw my boss under the bus to his family and blamed him for the oops.  It's now a big joke 😃  Now "Vincent" has an original card inspired by his Grandpa!😁


I have several others that i've made which I'll save for another time.  I hope you like these.  Please feel free to leave a comment if you do😀

 Have a wonderful day and HAPPY CRAFTING!

Sunday, October 21, 2018


Good afternoon everyone!

I'm finally back in my happy place and creating again.  Shoulder surgery took me away for awhile and I just lost my mojo.  


Here is my first card using all Stampin' Up! products in a long time.  I absolutely love the sentiment and should say this every morning.   It is from the stamp set, "A Good Day", and printed on So Saffron paper.  It is adhered onto Grapefruit Grove Nature's Twine.  By the way, if any of you are interested, all of the products used are currently available from the catalogue. 

The flower is made using Garden Impressions Designer Series Paper and the Daisy Punch.  The leaves are Old Olive and Garden Green, and I used the Flourish thinlits dies.  

The background is Night of Navy and the Basket Weave Dynamic Textured Impressions Embossing Folder, using the negative side.  

The card base itself is So Saffron cardstock and is a standard A2 size (4.25 x 5.5).

I hope you like it! 

Saturday, February 24, 2018


Happy Saturday, everybody :-)

I can't believe how long it has been since I wrote a blog.  A few great things have happened to me since my last one.

First, I landed a great full time job-FINALLY!  Now I can afford my hobby again.  It's actually with a company I used to do business with years ago at my old job.  The office is even down the street from my old job-about 2 blocks apart!!  Weird-I did a complete circle.  Anyway, I'm really enjoying being back to work, even though it takes away from my crafting time.  LOL

Second, I was just about to say goodbye to Stampin' Up! when I received a wonderful email that someone joined me.  She's also a hobbiest, but that's okay.  If she stays with me, that would be wonderful, if not, it was really nice to be able to say I had a team member for a little while:-)

So this is what i've worked on that strictly uses Stampin' Up! products.  I have all this wonderful stuff that I think I get overwhelmed with ideas and just can't get them produced.  But this time I did.  Here are two I made today.


I made this one for a woman who ordered from me recently.  This is only my second order that hasn't been from a friend :-)  I hope she likes it.


This one is for my new team member.  Lots of different techniques on this one.  

Well, that's really all I wanted to share today.  I hope you all have a wonderful day!


Thursday, March 23, 2017


Happy Thursday everyone!

I'm in the process of making this card for a relative for her anniversary.  It's supposed to be a joke to make her laugh before she gets her serious one.

She loves to garden, but hates worms.  So of course I had to make the card with a worm!  

First, the white piece of paper that I distressed in blue for a "sky" effect is cut at 4" x 5.25".  I used the Lawn Fawn, Slide On Over, straight die cut at about half way down the paper.  On the back side, place your slider piece of paper over the opening.  Then place double sided tape, thinly cut, around the top, bottom and side, making sure that it slides in and out easily.  Slide the piece of paper out to see where you will stamp your sentiment.  Peel the backing from the tape and attach to either a card base or another color card stock measuring 4.25" x 5.5".

The flowers are from a free digital print off of Pinterest.  Gotta love Pinterest :-) 

I colored the flowers with my spectrum noir markers, then cut them out.  These are then attached to the bottom red piece of paper.  This piece will eventually hide the slider opening.  

I cut the cute worm with my Cricut.  I attached a very small folded strip of cardstock to the worm to attach it to an extremely small piece of double sided tape the height of the opening on the slider piece of paper.  Then tested it to make sure it actually slides.  Once the worm is in place, I put another thin strip of double sided tape along the bottom and side of the opening, then placed the red piece of paper with the flowers over that.  This hides the worm and the opening.  I also placed another thin piece of double sided tape along the bottom of the white paper to attach the red paper to.  Makes it even.

That's really all.  I'm sure I will make another one of these soon and will definitely try to remember to at least take pictures of each step.  I had no idea this one would be so well liked.  Thank you so much!

If you have any questions about this little card, please feel free to leave it in the comments.

Again, thanks for all the wonderful compliments on this little card.  It really made my day!

Here is a quick video of the card in progress.  Let me know what you think :-)

Thanks again!

Wednesday, October 12, 2016

Paper Rose Tutorial


This is my very first video.  (Couldn't tell, could ya?) I know the camera angle isn't the best, but I tried :-)

I would appreciate only constructive criticism please, no haters allowed!

If and when I attempt this again, it will be for what i'm very comfortable with-making cards :-)

Until then, happy crafting :-)

Wednesday, August 31, 2016

Finally Able To Post Something!


Good morning fellow crafters!


It's been a while since I have put anything on my blog, but now that the kiddos are back in school, (happy dance), I will have a little more time to update it.


I haven't done much crafting in the last few months but here are a couple of cards I was asked to make for friends and family.


It was a lot of fun to make these cards, especially the Star Wars Lego card. For the base of the card, I used black card stock, white ink, and a silver glitter pen for the stars. Pinterest was a great help in finding free digital stamps of the lego's characters. They really pop against the black backdrop thanks to my spectrum noir markers.


The 50th birthday cards were a challenge. But I do love a challenge! So here it is-both my Mother and my Aunt asked for one to give to the same family member! I decided I would make 2 different styles using the info they gave me. My Aunt wanted a larger card than the standard A2 size, so I saw the "Z" card idea and just doubled it. My mother's card design I had used before and really liked it. What little I had left fit perfectly in the box. I used so many different products on these cards. Gotta love the cricut for cute die-cuts and Stampin' Up! for both stamps and thinlits.


The flower birthday card was for my Mom. Again, I tried something new. I used Stampin' Up!'s Thoughtful Branches stamp set and coordinating die cuts. The background is rainbow Deco Foil that I ran through my bigshot with a heart embossing folder. Didn't quite come out as I had hoped but I made the most of it. Called it the distressed look! Whatever works.


The cat card I made with Stampin' Up!'s Pretty Kitty stamp set. I just thought this stamp set was cute and had to make a card. I embossed the base card with a zig zag folder and cut small openings to place the ribbon through to make the bow. The vibrant color combo really came together.


The butterfly was a sympathy card for a coworker of mine. I cut out the oval for the center then hole punched all the little circles around it. For the butterflies, I used Stampin' Up!'s Bold Butterfly Framelits dies. I cut them out of black card stock, used velum for the back, and then colored them in.


The Halloween card I threw together one night just for fun. I put it on a few Facebook group sites I'm in and it was a hit. Now what do I do with it??


I think I made up for not posting for a while here. This blog went on and on. I hope to be able to post more now that there is peace and quiet for a few hours a day. My other goal is to try and make a video. I'm nervous, but who isn't trying something new?


I'll keep you posted.


If you would like to see more of my cards, please click the "Follow Me on Facebook" button to the right and it will take you to my Facebook page.


Have a great day and happy crafting!!


Tuesday, June 21, 2016

Check This Out!!

I can't believe how cool this new banner looks. I look so professional now!
I have to give Jessica Giglio props for doing such an awesome job for me. I'm sure I wasn't easy to deal with considering I have no computer savvy WHATS SO EVER!
Now I can't wait to get back to crafting. It has been SO long and I have missed it. School is out for my two girls and we have been on the road ever since.
We went to Virginia Beach, Washington D.C., Cancun, Minneapolis and Chicago all within a month and a half. I can't ever remember traveling this much. It was so much fun, but really good to be home.
This was the first time my girls have ever been on a plane also. I had to give up my window seat, but it was so worth it. They both did great, however, my hand is a little swollen from being held onto so tightly! Love it :-)
Our youngest is off to camp for 4 weeks, so things are a little quieter around here. I need to get on the ball and make her a card to send up there with a little care package. We'll be picking her up before I know it.
Ok-off to craft. Let me know what you think of the banner.

Tuesday, May 17, 2016

I Thought I Would Share


I thought I would share with you today what I have loved making for a few years now.  It's not even made with paper!  When I first put these in my Etsy shop, I couldn't believe the response.  I have even sold one and sent it to Australia!  I came up with this idea when a friend and neighbor of mine was having a baby.  She loves riding her bikes, so I thought it would be cute to have some sort of cycling onesie for her new addition.

I made two for her, I wish I had pictures to show you, one that said, "Future Cyclist" with a picture of a tricycle.  The other is the phrase that I came up with that says, "Forget Crawling!  Where's my bike?".  This has been my little success.  May be with this blog, it will become even bigger.

So here is a picture of my little creation, modeled by the cutest little boy who graciously lets me use his mug.  


If anyone is interested in purchasing one of these adorable little onesies, they are $15.00 each with $4.00 shipping.  You can find them in my Etsy shop at ThisGingerCrafts@Etsy.com.

Have a great day and happy crafting!

Judy

Thursday, April 28, 2016

Learned Something New Today

I wish I had done this years ago.  I learned how to put a watermark on my photos for my crafty creations.  Now I can't wait to play and put it on them :-)

Here are just two examples that I did this morning (the watermark-I can't create that fast!)


I really like the top one the best.  I'll have to go in and change the Mother's Day card later.  

I have to get ready for work so this will be it for now.

Have a great day and happy crafting!

Judy

Sunday, March 6, 2016

Sunday Fun Day!


I have been making so many cards and such that I need an outlet!  I really don't know what i'm going to do with all this.  Unfortunately, I just don't have it in me to go and ask store owners if they would be interested in my cards.  Any ideas??

Anyway, here are a few more of my creations.  I hope you like them :-)


Aren't these the cutest little boxes???  I just love them :-)

If anyone is interested in any of them, please feel free to leave a comment below.

Happy crafting!

Friday, March 4, 2016

Found-Blog I Thought I Lost A Few Weeks Ago

**The lower portion of this blog is a repeat, but the pictures are bigger for some of the cards i'm selling :-)

I haven't written anything on this blog in a very long time.  Holidays, craft fair, life all kinda got in the way.  Here are just a few things that have happened.

I had the large craft fair in November, then Thanksgiving, Christmas, New Years.  I think things have finally settled down a bit. 

Let's start with the craft fair.  My last.  Definitely.  Not to say that I didn't do well, I did much better than any other year, but I had to slash my prices so much on my wreaths and topiaries that it made me cry.  Not worth it. 

Now the paper creations I made this year, some of those sold out the first day!  That lifted my spirits, a little.  The second day, hardly anything sold.  Kind of a let down.  That made my decision not to do this again pretty easy.  Plus, they raised the price for the booth.  I just can't justify it.  So, it was fun while it lasted, but now it's over.  The people watching and hanging out with my daughter was fun!!  She just had to post this pic on Instagram!


 I have recently joined a couple of groups called Stamping Addicts and Simply Stamp It.  Simply Stamp It had a contest, and the rules were that you could only use 3 colors of their choosing, so I decided to try it.  This was at 10 p.m and it closed at midnight that night.  I finished my card at 11:10! I wasn't sure if I had made the deadline or not.  I didn't know if it was midnight eastern time, central time, etc.  You had to have the most comments to win, and to my surprise, I won.  I couldn't believe it.  I was showing everyone that would look at what I won!  I was very proud of my little "last minute" card.

The other card was picked from several on Stamping Addicts Facebook page.  They made it their cover photo for a week.  I was shocked.

These were both mood boosters for me to say the least.


So again, the craft fair was fun, but as I said before, it will be my last.  It takes too much time away from my family around the holidays.  With that said, I have several cards to sell and have pictured a few below to test the waters.  They are $3.00 plus shipping and all come with envelopes.  If interested, please leave me your PayPal address and I will happily send an invoice.  When paid, I will ship them out.


If something more specific is needed, I LOVE making custom made, personalized cards.  Just ask!

Please feel free to leave comments below.  I would love to know if anyone actually reads this blog! LOL!!

So I Had An Idea.....

Hi everyone!


So I had an idea-I decided to start a Pinterest page for my cards that i've been accumulating.  I thought this might be a great way to get them out there for people to see, and possibly, purchase.  I really wanted to try and sell them here locally in a florist's shop, but someone already beat me to it.  Then I thought, why not on my own blog?  So, here goes nothing.


This is just a small sample of cards I have available.  I also do customized cards for $5.00 each.  For larger orders, please leave me your email address for pricing.

All cards are $3.00 each, or 2 for $5.00, and come with an envelope.

If anyone is interested in any of these one of a kind cards, please leave me your PayPal address in the comment section below, along with the description of the card, or cards, and I will send you an invoice.  Shipping is $.75 per card, or $1.50 for 2 to 5 cards.  The cards will be shipped USPS first class, with tracking, securely in a bubble wrap envelope. 

Thanks and have a fantastic day!

Happy crafting :-)


I almost forgot to mention, I have decided to become a Stampin' Up! demonstrator.  Here is the link to my page if you are interested in all things Stampin' Up!.  http://ThisGingerCrafts.stampinup.net.  Right now until the end of March, Stampin' Up! is having it's Sale-a-Bration sale.  For every $50 you spend, you receive a free item from the Sale-A-Bration flyer shown below.


Also, every Tuesday, Stampin' Up! has weekly deals.  You can find these on the above website.  If you are interested in hosting a party, please leave me your email address.  If you host a party, and have over $150.00 in sales, you receive hostess incentives.  It's pretty sweet!

Sunday, November 8, 2015

Little Box of Cards


I had a lot of fun working on this.  I've made several of these, but none with strictly Stampin' Up! products.  These are simple, but cute, and make great little gifts.

I used the Zoo Babies, A Dozen Thoughts and Flower Shop stamps in Delightful Dijon and Mint Macaron.

The 3" x 3" cards are made from Whisper White, Mint Macaron and a piece from the Lullaby Design Series.  

I don't have SU envelopes, so I can't picture the ones I use.  I also put it in a clear treat bag with a coordinating topper to finish it off.

Here are a few pictures of the box and cards.

I hope you like them!


Have a great day and happy crafting!

Saturday, November 7, 2015


HELLO CARD

This is the first time I've ever used nothing but Stampin' Up! products for a card.  Almost everything I used came from my Demonstrators starter kit.  I had to think long and hard about what I needed, not just wanted.  And, of course, I wanted EVERYTHING!

For this card, I used a color combination I had never tried before, and because Stampin' Up! colors coordinate with eachother, it turned out beautifully.  I used Tip Top Taupe, Mint Macaron and Whisper White.  I also used the coordinating stamp pad in Tip Top Taupe.  I LOVE this color.  That and Old Olive, but i'll get into that color later!  I bought these items as a bundle also.  You get 20 sheets and 5 coordinating ink pads.  Great way to start building your products.

The stamp pads are incredible.  They aren't felt like others but foam.  And they arrive so saturated with ink that I don't have to put my stamp on it more than once and it's covered.  Love it.

I also used washi tape for the first time EVER.  It was SO HARD to work with.  (Can you hear the sarcasm there?)  I used the green with clear polka dots from the Sweet Sadie designer series.  It was on clearance (another great resource) so I thought I would try it.  Little details can add a lot to your projects and washi tape is one of them.  If you haven't tried it, do so.  You won't regret it.

For the background, I used the Large Polka Dot textured impressions embossing folder on Tip Top Taupe.  I have many embossing folders, but this by far is my favorite.  The impressions are deep and really show up.

For the flowers, I used the Flower Patch Photopolymer bundle set.  For the center of each flower is a Jewels Basic Rhinestone.  These are really clear and shine so bright.

The ribbon was a gift from my Upline for joining her team.  It is Early Espresso cotor ribbon and it's 1/4" wide.  I really like the feel of this ribbon.

So, there it is.  My very first Stampin' Up! card.  I can't wait to play some more!  If you would like to purchase any of the products that I have listed in my blog, please visit my Stampin' Up! website at 
www.thisgingercrafts.stampinup.net
.  Also, feel free to brouse the weekly deals and clearance sections.  They are a great resource for building your Stampin' Up! products.

Have a great day and happy crafting!

Judy

http://thisgingercrafts.blogspot.com

It's All About Him


So my SO is constantly giving me trouble about my crafting.  He lovingly refers to it as "crapbooking".  Don't hurt him.  He says I spend way too much time in my craft room-is there such a thing?

Anyway, in the last few months, this man who constantly gives me "crap" about my crafting, has asked me to help him make things for him!

To start off with, he just became head coach of the high school softball team.  He asks me to make the entire team, bows.  "Of course, honey."  is my response.  For a first timer, these came out well.  The girls really liked them.  Validation.  


Then he asks me to make him a get well card for the other softball coach for the girls to sign.


Do you see where this is going???

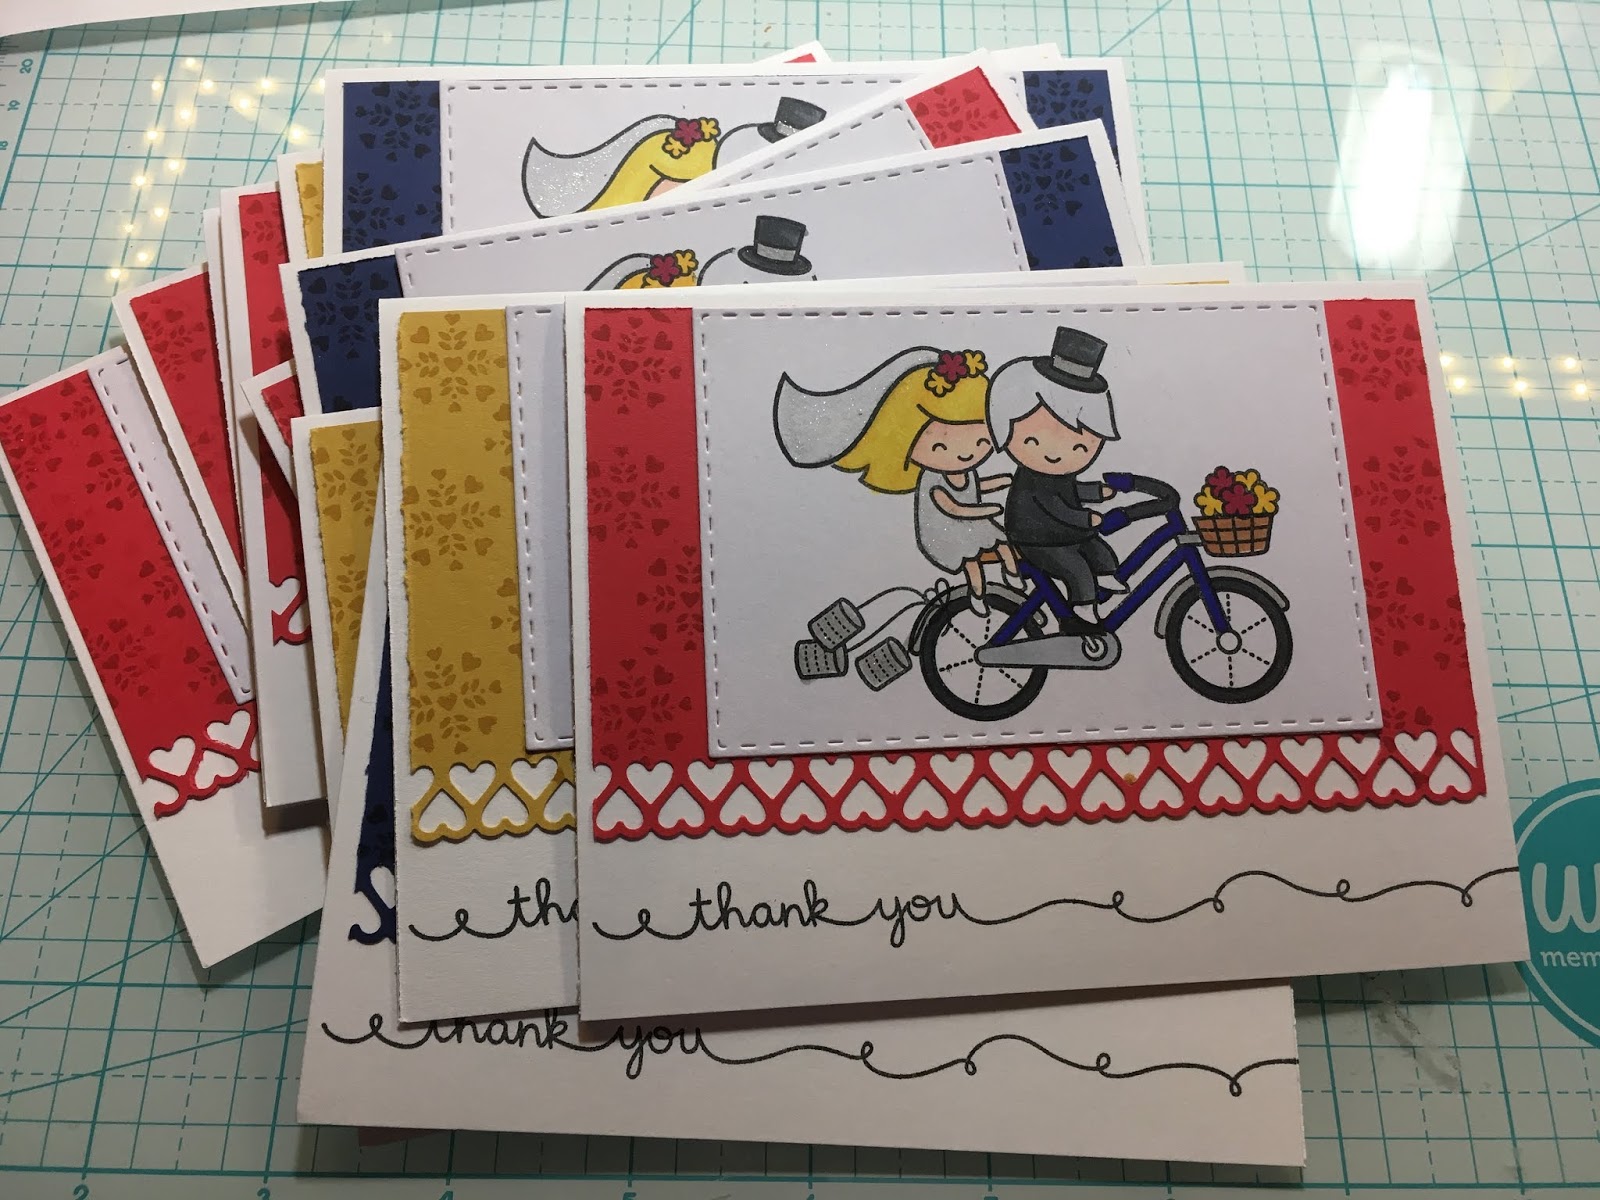
Again, he asks for more cards. This time he needs "Thank You' cards for parents hosting team dinners at their homes.  Of course I say yes again.  Somehow they got out of here before I could take a picture.  Boo.

Now he needs me to make him Christmas cards for another teacher as a "Thank You."  And here they are:


As you can see, I'm happy to do these things for him.  He always says thank you to me, so he's forgiven.  LOL  

Have a great day and happy crafting!

Wednesday, November 4, 2015

Hello:-)

I have been busy, busy, busy.

My craft fair is in 2 weeks and I have so much more to do.  All I can say is, Thank You Pinterest.  This is a fantastic site for someone like myself who has SO MUCH PAPER that I don't know what to do with it all.  Good old Pinterest has helped me use it.  Use a lot of it at least.  It still doesn't look like I've even made a dent in my supply.  When my kiddos see me looking at a paper pad, they are both in unison "You don't need any more paper Mom!".  The picture shows about half.  They may be right.


Here are just a few pictures of some of the items I will hopefully sell.  If not, my Etsy shop B and G Inspirations will be really full!  I need to find the names of these crafters who gave their ideas to Pinterest and send them a big THANK YOU!  Robyn, you're one of them :-)  I just had to use your candy bar wrapper idea.  Too cute and easy to make.  And who can resist chocolate???  So, THANKS ROBYN!


Kerry's Paper Crafts is another website I frequent.  I have used several of her ideas.  She is an amazing crafter.  

 The problem I have come to find out about using candy is that I think i've eaten 1/2 my product!  Oops.

I have so many pictures of items that I hope to sell, that I think I will save them for another blog entry.  I don't want to make this one super long and boring.  Or have I already?

Bye for now and happy crafting!

Judy